This article demonstrates how to override app settings values on Azure Web App by creating a straightforward RESTful Web API service, deploying it to Azure Web App, and then overriding specific settings.
Web API Creation
To start, create a simple .NET 6 application (the latest LTS version at the time of writing) using the following command:
dotnet new webapi -o TestApi
Next, add a sample settings in appsettings.json:
  "Position": {
    "Title": "Editor",
    "Name": "Joe Smith"
  }
Create an options object to map these setting object in a file named PositionOptions.cs:
namespace TestApi.Models;
public class PositionOptions
{
    public const string Position = "Position";

    public string Title { get; set; } = String.Empty;
    public string Name { get; set; } = String.Empty;
}
Map the configuration settings for Dependency Injection by adding it to Program.cs:
// Add services to the container.
builder.Services.Configure<PositionOptions>(
    builder.Configuration.GetSection(PositionOptions.Position));
Finally, add the controller in a file named TestController.cs:
using Microsoft.AspNetCore.Mvc;
using Microsoft.Extensions.Options;
using TestApi.Models;

namespace TestApi.Controllers;

[ApiController]
[Route("[controller]")]
public class TestController : ControllerBase
{
    private readonly ILogger<TestController> _logger;
    private readonly PositionOptions _options;

    public TestController(ILogger<TestController> logger, IOptions<PositionOptions> options)
    {
        _logger = logger;
        _options = options.Value;
    }

    [HttpGet]
    public PositionOptions Get()
    {
        return _options;
    }
}
Testing the App Locally
Build and run the application using the following commands:
dotnet build
dotnet run
If everything is correct, the output should resemble the one below:
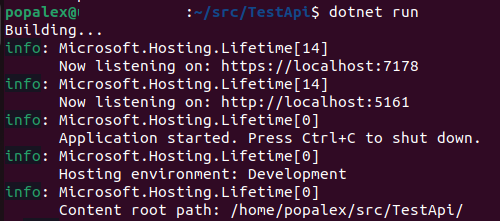
Next, open the browser at https://localhost:7178/swagger/ and test using the Swagger API:
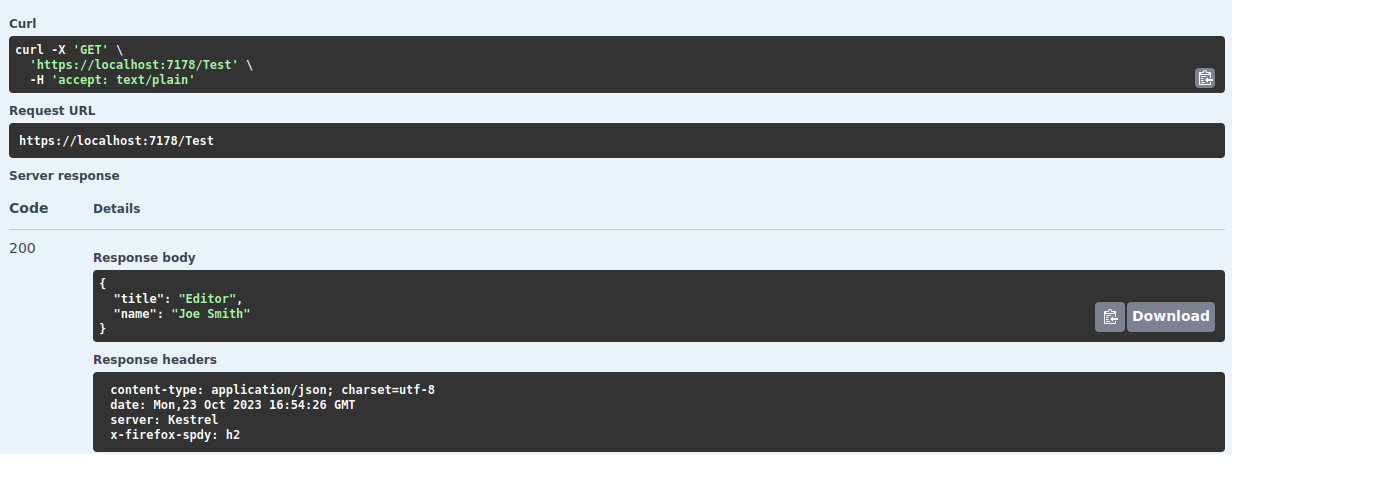 Note: Ensure you have proper indentation in your JSON files for clarity and readability.
Azure App Service Creation
To deploy the app in Azure, publish the app and create a zip file with the output:
dotnet publish -o publish
cd publish; zip -r ../publish.zip *; cd ..
Then, create a Resource Group, App Service Plan, and App Service (update the names as necessary):
az group create --name test-rg --location westeurope
az appservice plan create --name asp-test-20231023 --resource-group test-rg --sku F1
az webapp create --name as-20231023 --resource-group test-rg --plan asp-test-20231023
Azure App Service Deployment and Configuration
First, deploy the archive:
az webapp deployment source config-zip --src publish.zip -n as-20231023 -g test-rg
Next, open Azure Portal, find the Resource Group, the App Service, and then the configuration blade.
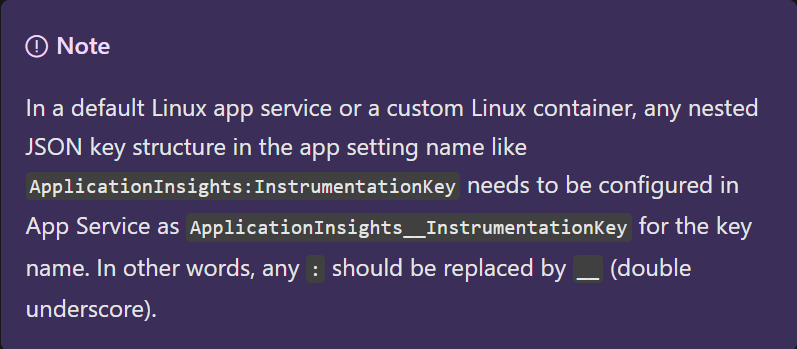 Remember to replace
 . with _ and : with __ if app setting names contain these characters.
For example Position:Title key becomes Position__Title
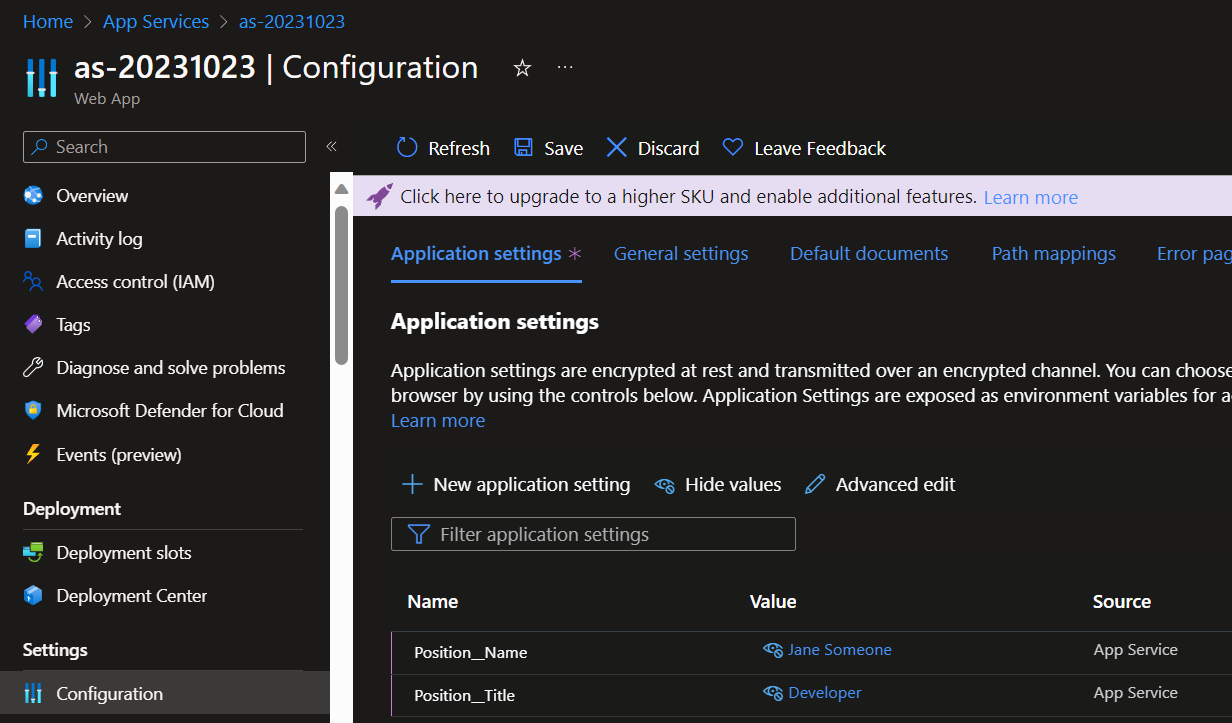
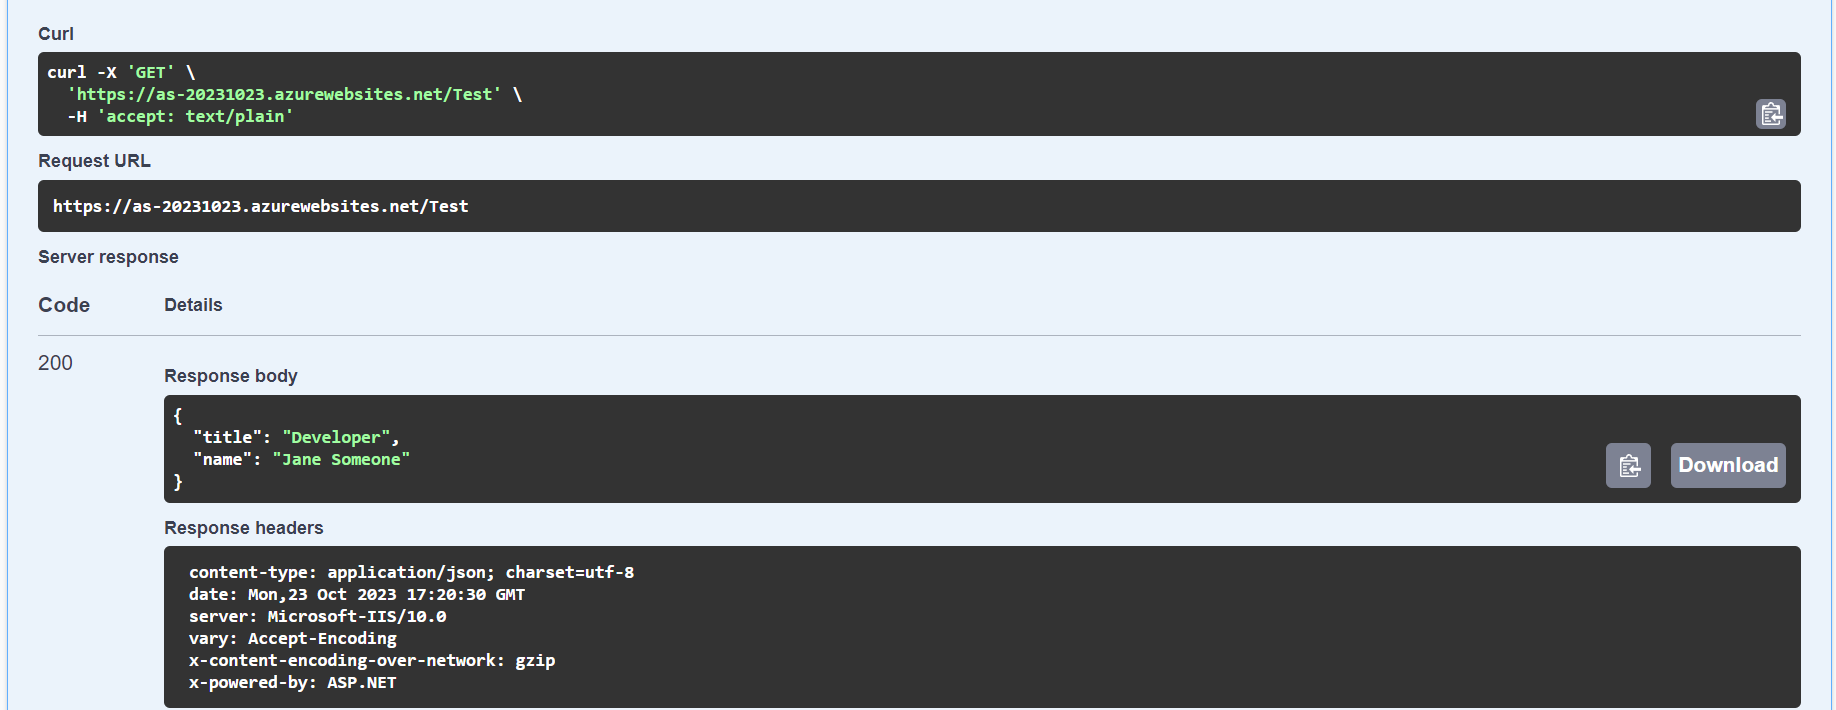
Finally, save the configuration and restart the App Service. If everything is correct, you can open the Swagger interface and check the result:
Documentation and links:
- Azure CLI install on Linux - https://learn.microsoft.com/en-us/cli/azure/install-azure-cli-linux
- Deploying a DotNet Core app in Azure Web App by command line - https://camargo-wes.medium.com/deploying-a-dotnet-core-app-in-azure-web-app-by-command-line-cede4f021951
- Configure an App Service app - https://learn.microsoft.com/en-us/azure/app-service/configure-common